Sticker Instructions
Disclaimer: Please note that aligning sticker designs with full page templates is still in an experimental stage, and you may need to make a number of adjustments before getting everything lined up properly. Printing the images using a label printer like the Brother QL-800 or QL-1100 eliminates all hassle, as well as the need to purchase ink.
Full Page (U.S. Letter 8 1/2" x 11") Template Instructions
Step 1: Use size 3 1/3" x 4" Blank Rectangle Labels, available for sale from Avery here, or from another manufacturer. Make sure you select a material compatible with your printer.
Step 2: Download a 3 1/3" x 4" sticker template from the Stickers page, or simply open it within your browser. If you downloaded a template, use a browser to open the downloaded file. Brave, Chrome, and Chromium have been shown to work.
Step 3: Set your printer to print "labels", if that option exists.
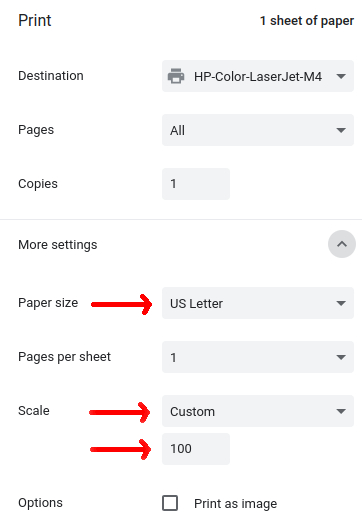
Step 4: Select "Print". When the Print dialogue opens, under the More Settings section, verify the paper size is 8.5 x 11 or US Letter, update the Scale to Custom, and set the size to 100.
Step 5: Print a test sheet on a plain piece of paper to determine the correct orientation, and to ensure the images will line up with the stickers.
Step 6: Print one sheet at a time to ensure printing accuracy and to avoid printer jams.
Note: All designs are compatible with the Brother QL-800 and QL-1100 Label Printers, as well as other label printers (right click on the image and choose "Save image as...", then load the saved image within the printer's software).
Tips/Advice: For full page troubleshooting, please visit this page. When using stickers, please respect local businesses and avoid damaging private property.... but if it's a COVID propaganda sign, sticker the hell out of it.
Back to the Stickers page.